GUI Application Guide
The DaRT Reader GUI provides a user-friendly interface for: - Loading DaRT extracts - Viewing extract metadata - Exporting to databases - Exporting to CSV files
Prerequisites
You need a valid license key to start. Go to the File menu and select Settings:
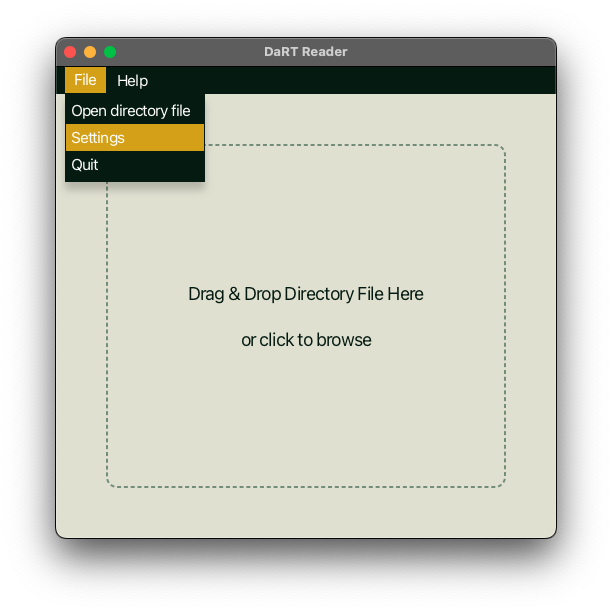
In Settings there is a field called License Key. Enter your key and press save.
Loading DaRT extracts
To load a DaRT extract first make sure that the directory file and the payload files are in the same directory. Then either drag and drop the directory file into the Drag & Drop field or click on the field. If you click on the Drag & Drop field, a file selection dialog appears. Choose the directory file and after a short time you will see metadata about the extract.
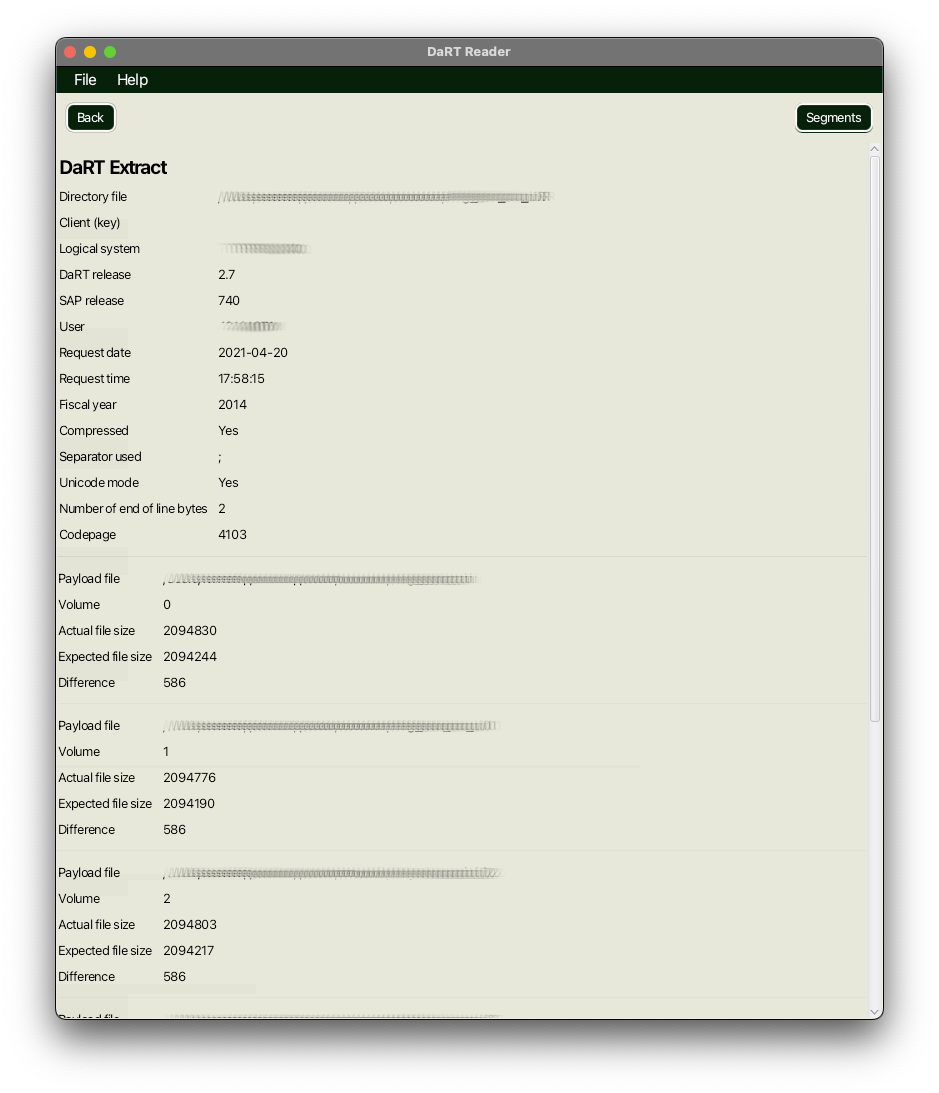
You see some metadata of the extract: The user who created the extract, when it was created, the fiscal year of the extract,
the DaRT release and SAP system. You also see the payload files of the extract, the file size each one states in the record
it ends with, and the file size it actually has on the file system. The difference between those two has to read 0.
Seeing what is in the extract
After loading the extract, click on the Segments button on the top right. You see all the segments that are contained in the
extract.
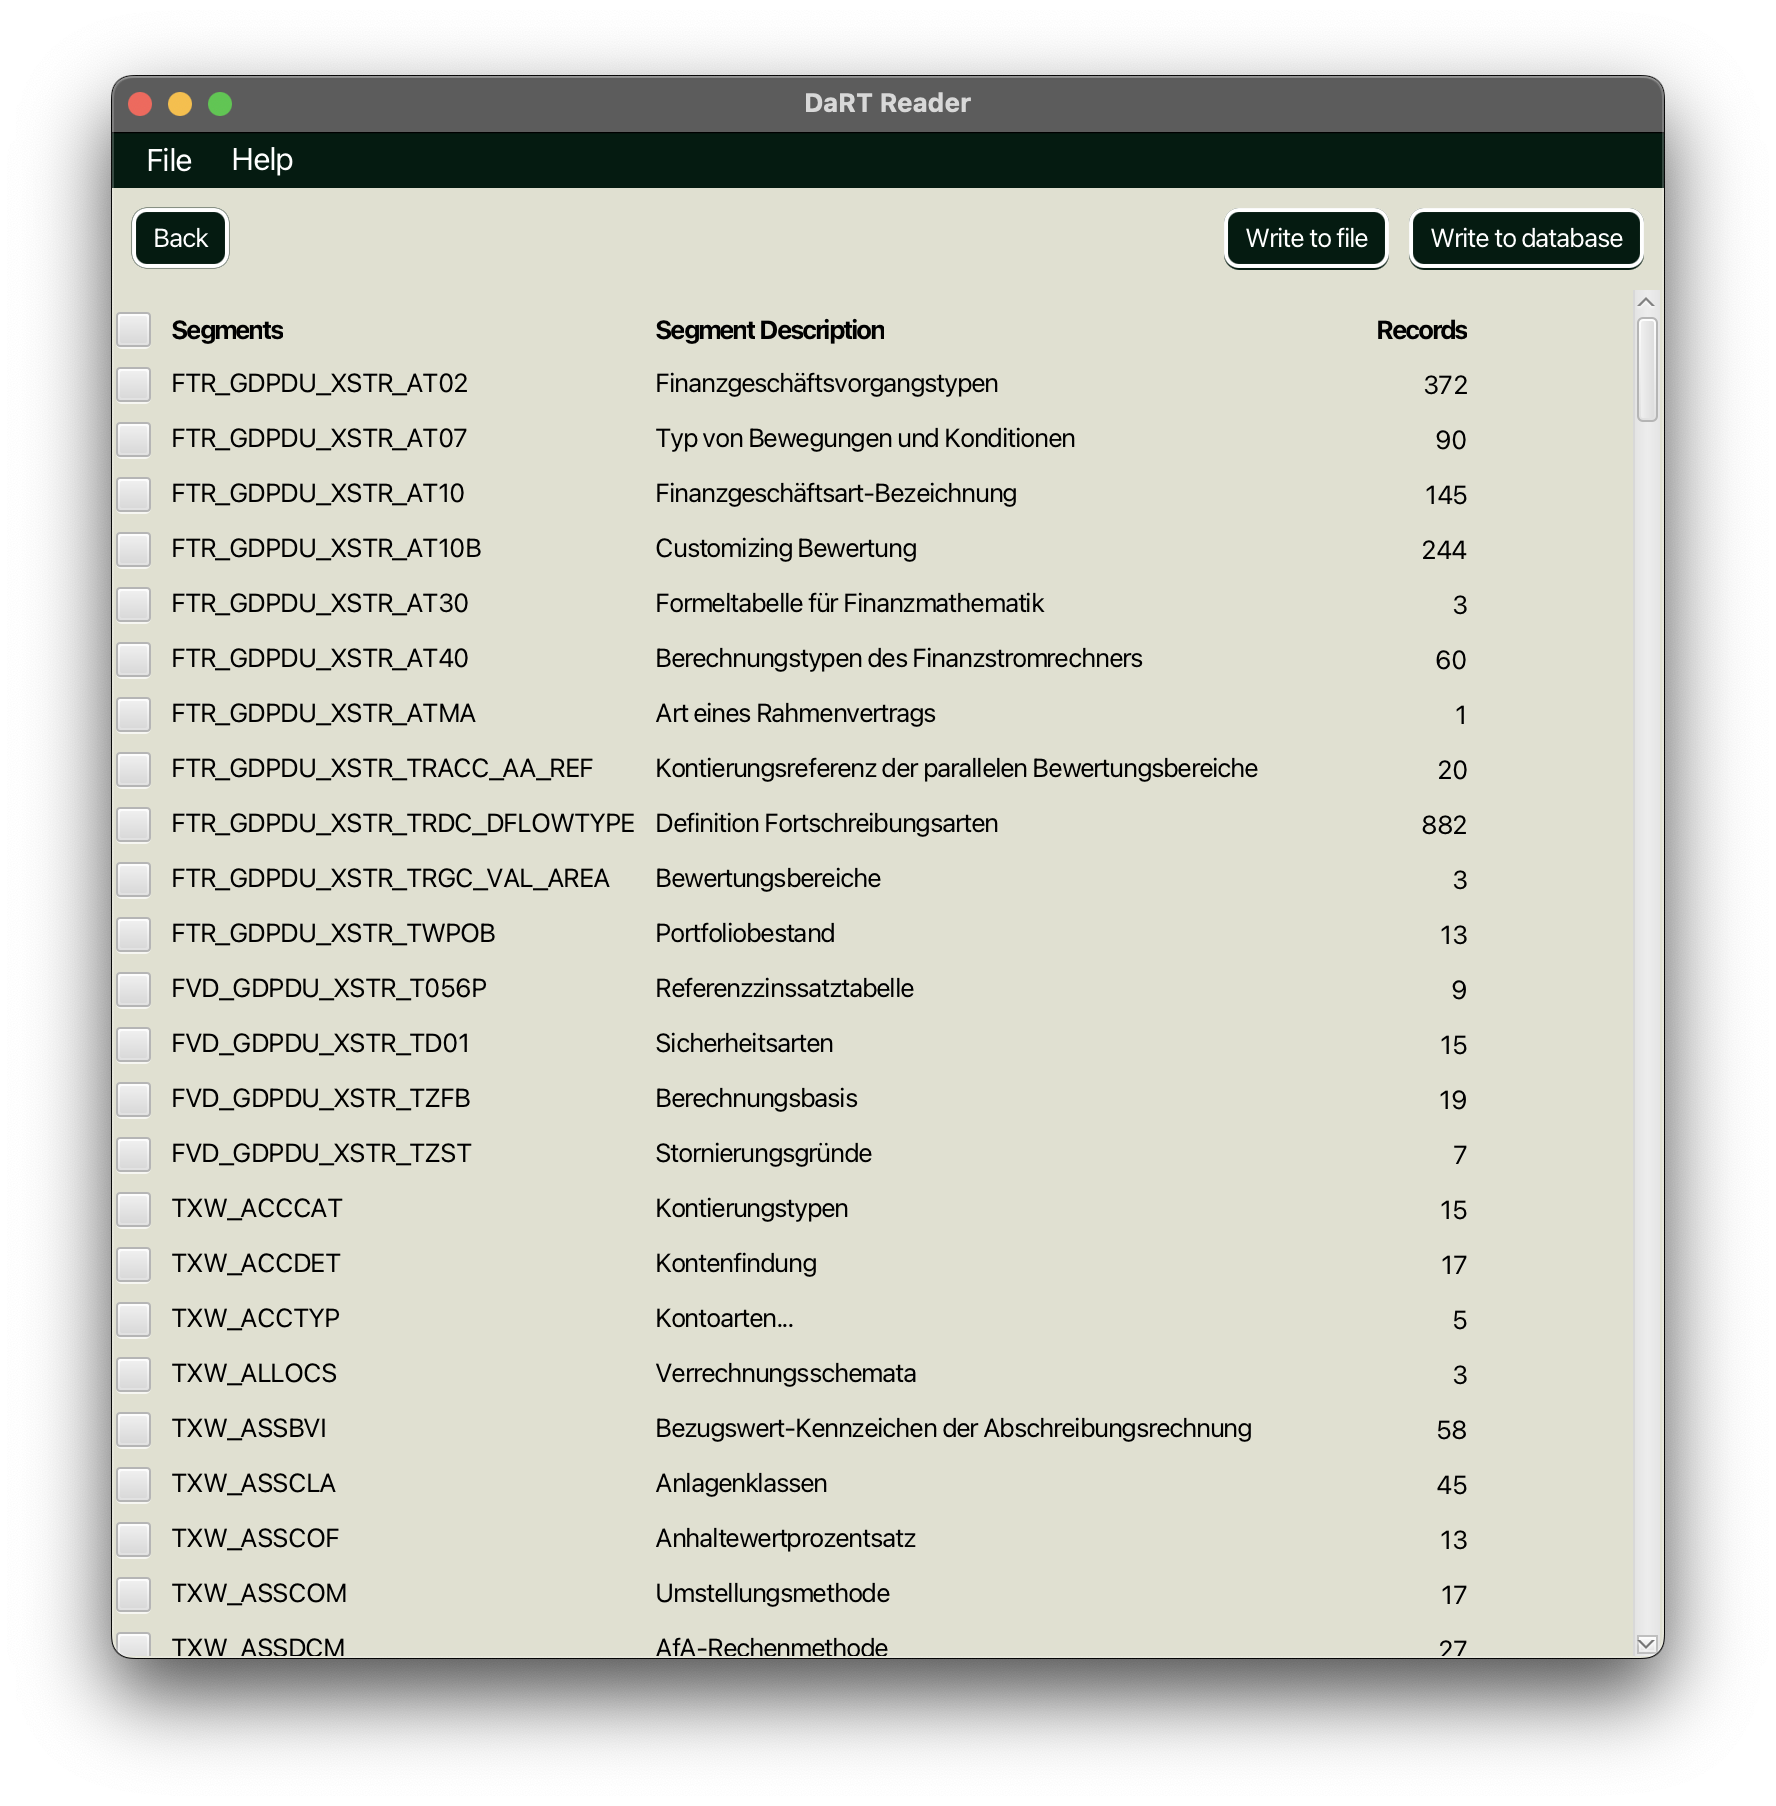
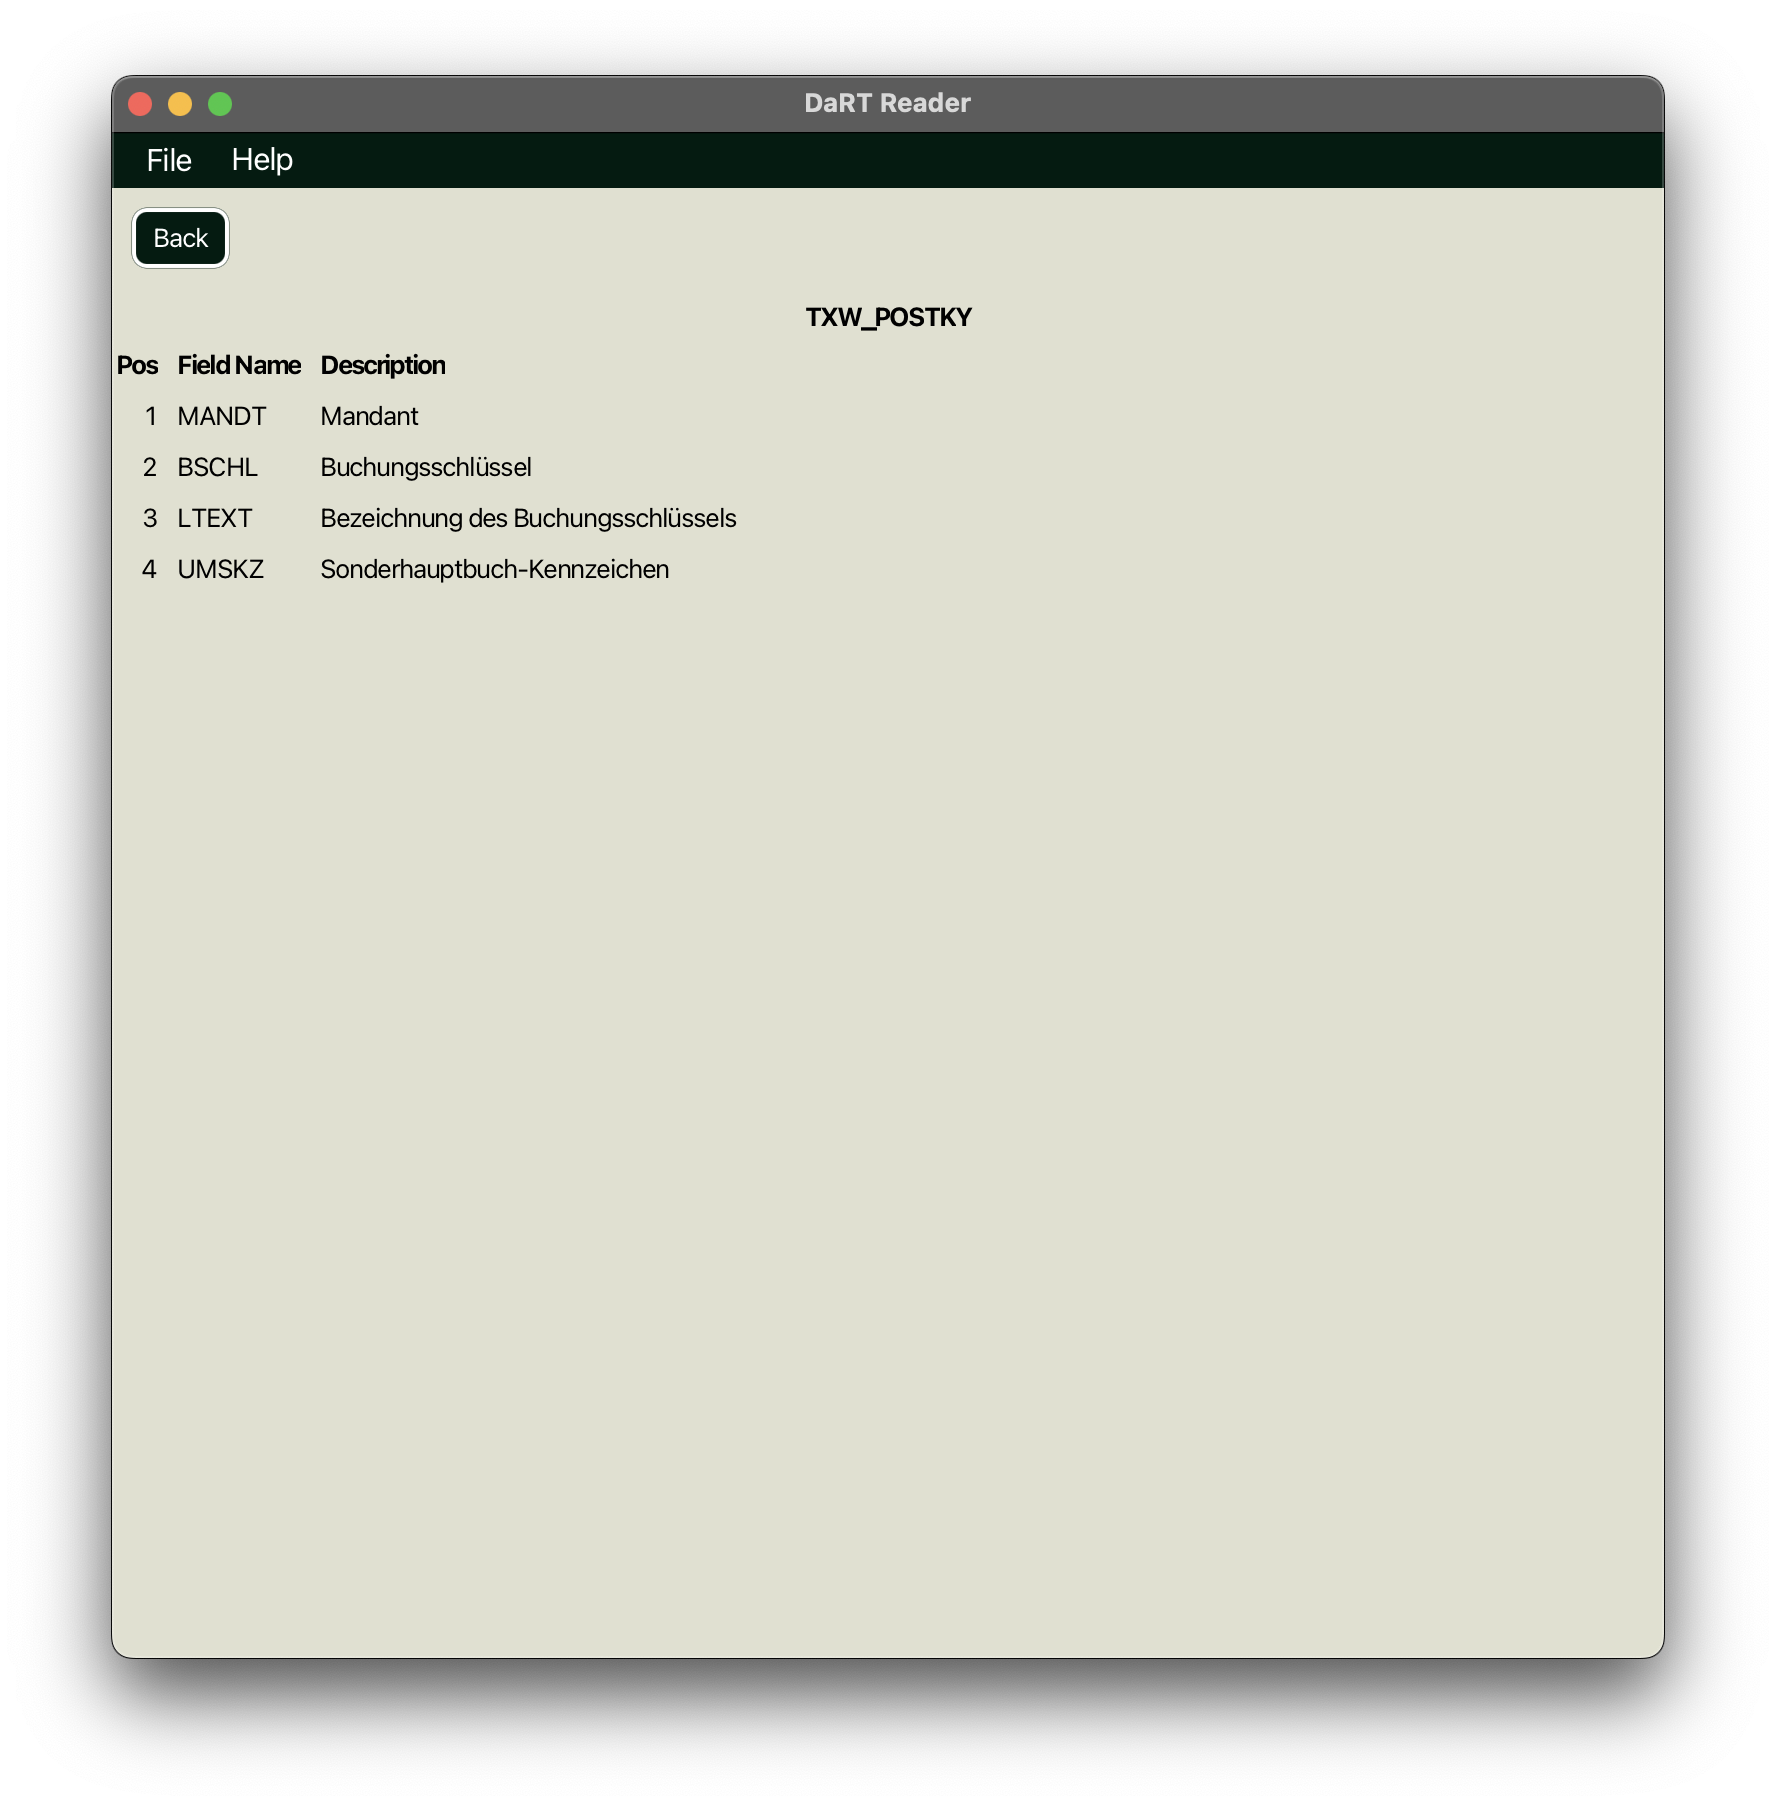
You see the segment name, the description of the segment and the number of records contained in the extract. The information is in the language of the extract. By clicking on any of the rows, you see the field names, their description and their ordering in the segment.
Writing the extract
Navigate to the segment overview. Select the segments that you want to write. On the top right there are two buttons
Write to file and Write to database.
Writing to a database
Click on the button Write to database and a window appears. You can select a database that you want to write to:
- SQLite
- H2
- PostgreSQL
- SQL Server
- DuckDB
- MS Access
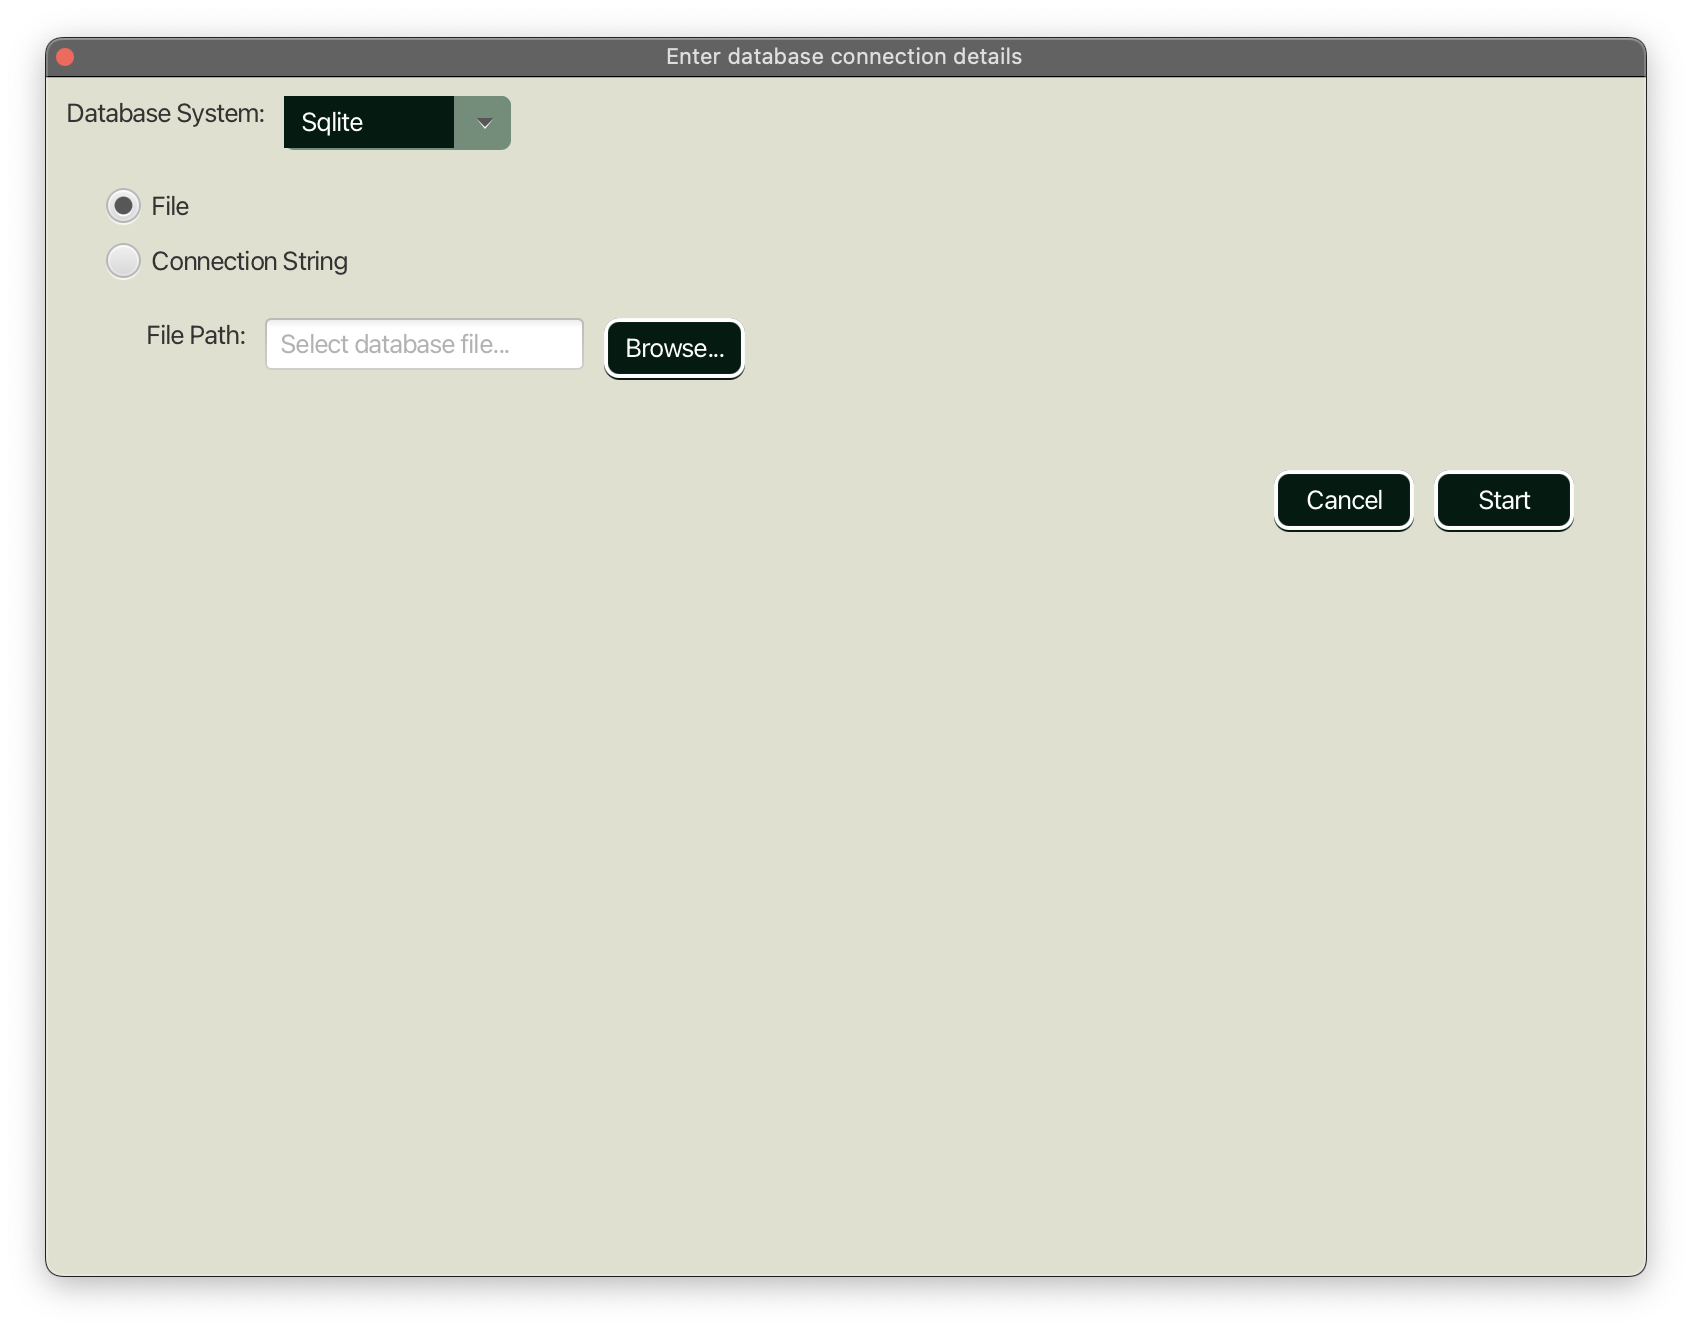
For databases that create a single file on the file system (SQLite, H2, DuckDB, MS Access), you have the option to select a file on the filesystem. This file does not need to exist yet.
For these databases, you can alternatively, and for the other databases you must, enter a connection string. For the databases for which you must enter a connection string, it is understood that there is a running server process that DaRT Reader can connect to.
Please see the documentation of the respective JDBC drivers or database system on how to form the connection string:
ℹ️ Note: If you enter a connection string, leave out the protocol prefix. For example, in
jdbc:postgresql://localhost:5432/mydb, leave outjdbc:postgresql:.
The column types used for amounts and quantities differ between these databases, and SQLite has a limit worth knowing about before you pick it. See Amounts and quantities.
Click start and the writing process starts. The progress is indicated by a progress bar. You have the option to halt or abort the writing process by clicking on the appropriate buttons.
Writing CSV files
In the segment overview click the button Write to file. You are prompted to select a directory to write to. Once you
selected it the CSV files will be created according to the schema <segment-name>.csv. Please make sure that the
directory does not contain files that are to be created. Otherwise you will receive an error message and the writing will abort.
Changing the settings
You can change how DaRT Reader connects to the database and how much data is written at the same time. On the File
menu select Settings.
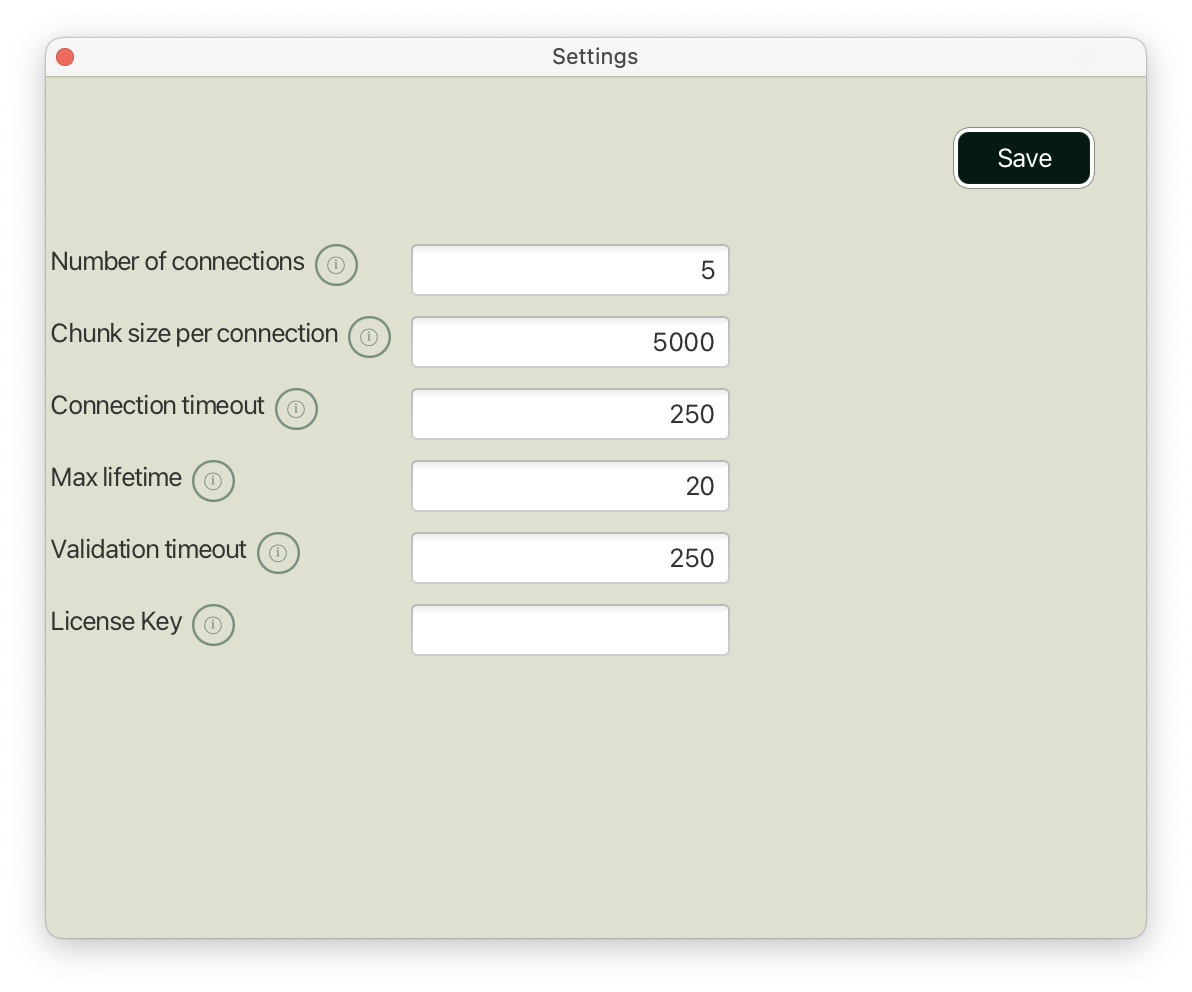
Here is a description of the setting parameters:
| Setting | Description |
|---|---|
| Number of connections | The number of database connections. This controls the number of parallel write processes. Writing CSV files uses the same number as the number of files written at the same time. |
| Chunk size per connection | The number of records written per connection, and per file when writing CSV files. |
| Segments read at once | The number of segments read from the extract and parsed at the same time. 8 by default. |
| Connection timeout | The maximum number of milliseconds that a client will wait for a connection. |
| Max lifetime | The maximum lifetime of a connection in the connection pool in milliseconds. |
| Validation timeout | Maximum milliseconds after a connection is declared dead. |
| CSV field separator | The character written between two fields of a CSV file. A German Excel expects ; and opens a comma separated file as a single column. Prefilled from this machine's region. |
| CSV decimal separator | The character written inside an amount in a CSV file. With the wrong one the file opens in columns but the amounts arrive as text and cannot be summed. |
| CSV byte order mark | Three bytes at the head of each CSV file that tell Excel the file is UTF-8. Without them a file opened by double-click on Windows is read in the ANSI code page and umlauts arrive wrong. On unless you turn it off. |
| License key | A license key that you retrieved during the onboarding process. |
| Compare every value | After writing to a database, read every value back and compare it against the extract. On by default. See below. |
| Compare sampled rows | After writing to a database, compare 1 000 records of each segment row by row. On by default; it adds two columns to every table it writes. See below. |
| Log level | How much detail is written to the log file. warn by default; raise it to debug when support asks. |
Checking what was written
The progress bar counts records. It tells you that rows arrived, not what is in them: a value written into the wrong column, cut short by the column type, or lost converting the extract's text into a number would fill the bar just the same. Two settings look at the values themselves. They are independent — you can switch on either, both or neither — and they answer different questions.
Compare every value reads every value of every row back out of the database. It does not then hold them against each other one by one. Each value is folded into a running total for its column, and what is compared at the end is one total per column, one over whole rows, and the number of rows — a handful of numbers per segment rather than a comparison per cell. Every cell is still covered, and a changed value changes its column's total; what the check cannot do is say which value. It names the segment and the column. Naming the row, and the byte of the extract the row came from, is what Compare sampled rows is for. It changes nothing about the database, but it does take time: every value has to be read back. On a test extract of 287 segments and 99 016 records written to a local SQLite file, the write takes about 1.1 seconds and the comparison another 0.9. Against a database that is slower to write to, the share is smaller. This is the check that finds a single damaged value among millions.
Compare sampled rows takes 1 000 records of each segment and compares them record by record, so that a difference can be named down to the row and to the byte in the extract the record came from. It finds what is systematic — a mapping that goes wrong for a whole column, where a hundred records are already enough to be sure — and it is not the check that finds one damaged row in a million. That one is Compare every value.
To find a row again it needs to know which record it came from, so it adds two columns, DR_VOL_ID
and DR_SRC_OFFSET, to every table it writes. The setting is on unless you turn it off, so this
is worth knowing before you hand the database on: anyone you give it to — an auditor included — sees
two columns that are not in the extract.
Both are also on the Write to database window itself, under After writing, prefilled from these
settings. What the settings say is what you usually want; the two boxes on that window are where you
decide differently for one run. For Compare sampled rows that window is the only place the decision
can be made at all late enough to matter and early enough to work: the two columns are part of the
schema, so they are settled when the tables are created.
Neither setting has any effect on writing CSV files. The files are meant to be the extract, and the two columns have no place in them.
If a check finds a difference, the run is reported as failed and the message names what differs — even though every record arrived and the progress bar reached the end. That is deliberate. What the run is for is a database that holds what the extract holds, and a difference means it does not, however many rows are in the tables.
Where the settings are stored
The settings, including the license key, are kept per user and outside the installation directory, so they survive an update and do not need administrator rights:
| Platform | File |
|---|---|
| Windows | %APPDATA%\taxforge\DaRT Reader\settings.json |
| macOS | ~/Library/Application Support/com.taxforge.dartreader/settings.json |
Each user of a machine therefore has their own settings. To keep them somewhere else, start the
application with -Ddart-reader.config-dir=<directory>.
Log files are written next to them, under %LOCALAPPDATA%\DaRT Reader on Windows and
~/Library/Logs/DaRT Reader on macOS, where Console.app picks them up.
The log level can also be set for a single run through the DART_READER_LOG_LEVEL environment
variable, which takes effect a moment earlier than the setting and so captures the first few lines
written during startup as well.
You can tradeoff higher throughput (size divided by time) with more memory consumption if you increase the Number of connections
or the Chunk size per connection parameter. With number-connections = 5 and chunk-size-per-connection = 5000, batches of 5000 records will
be written in 5 parallel connections amounting to 25,000 records. If the throughput is too
high, you might get Out of memory errors. If this happens, you have to increase the memory of the JVM.
Both of those describe the writing side. Segments read at once describes the reading side, and it
applies whether you write to a database or to files. Reading and parsing the extract is usually the
slower half of a run, so raising this shortens the run noticeably.
Increasing memory of the JVM
From the installation directory, follow the relative path app on Windows and Contents/app on Mac OS and open the
file DaRT Reader.cfg.cfg. At the end of this file in a section called [JavaOptions], make the following additions:
Viewing the log
In the File menu click Help > View Logs
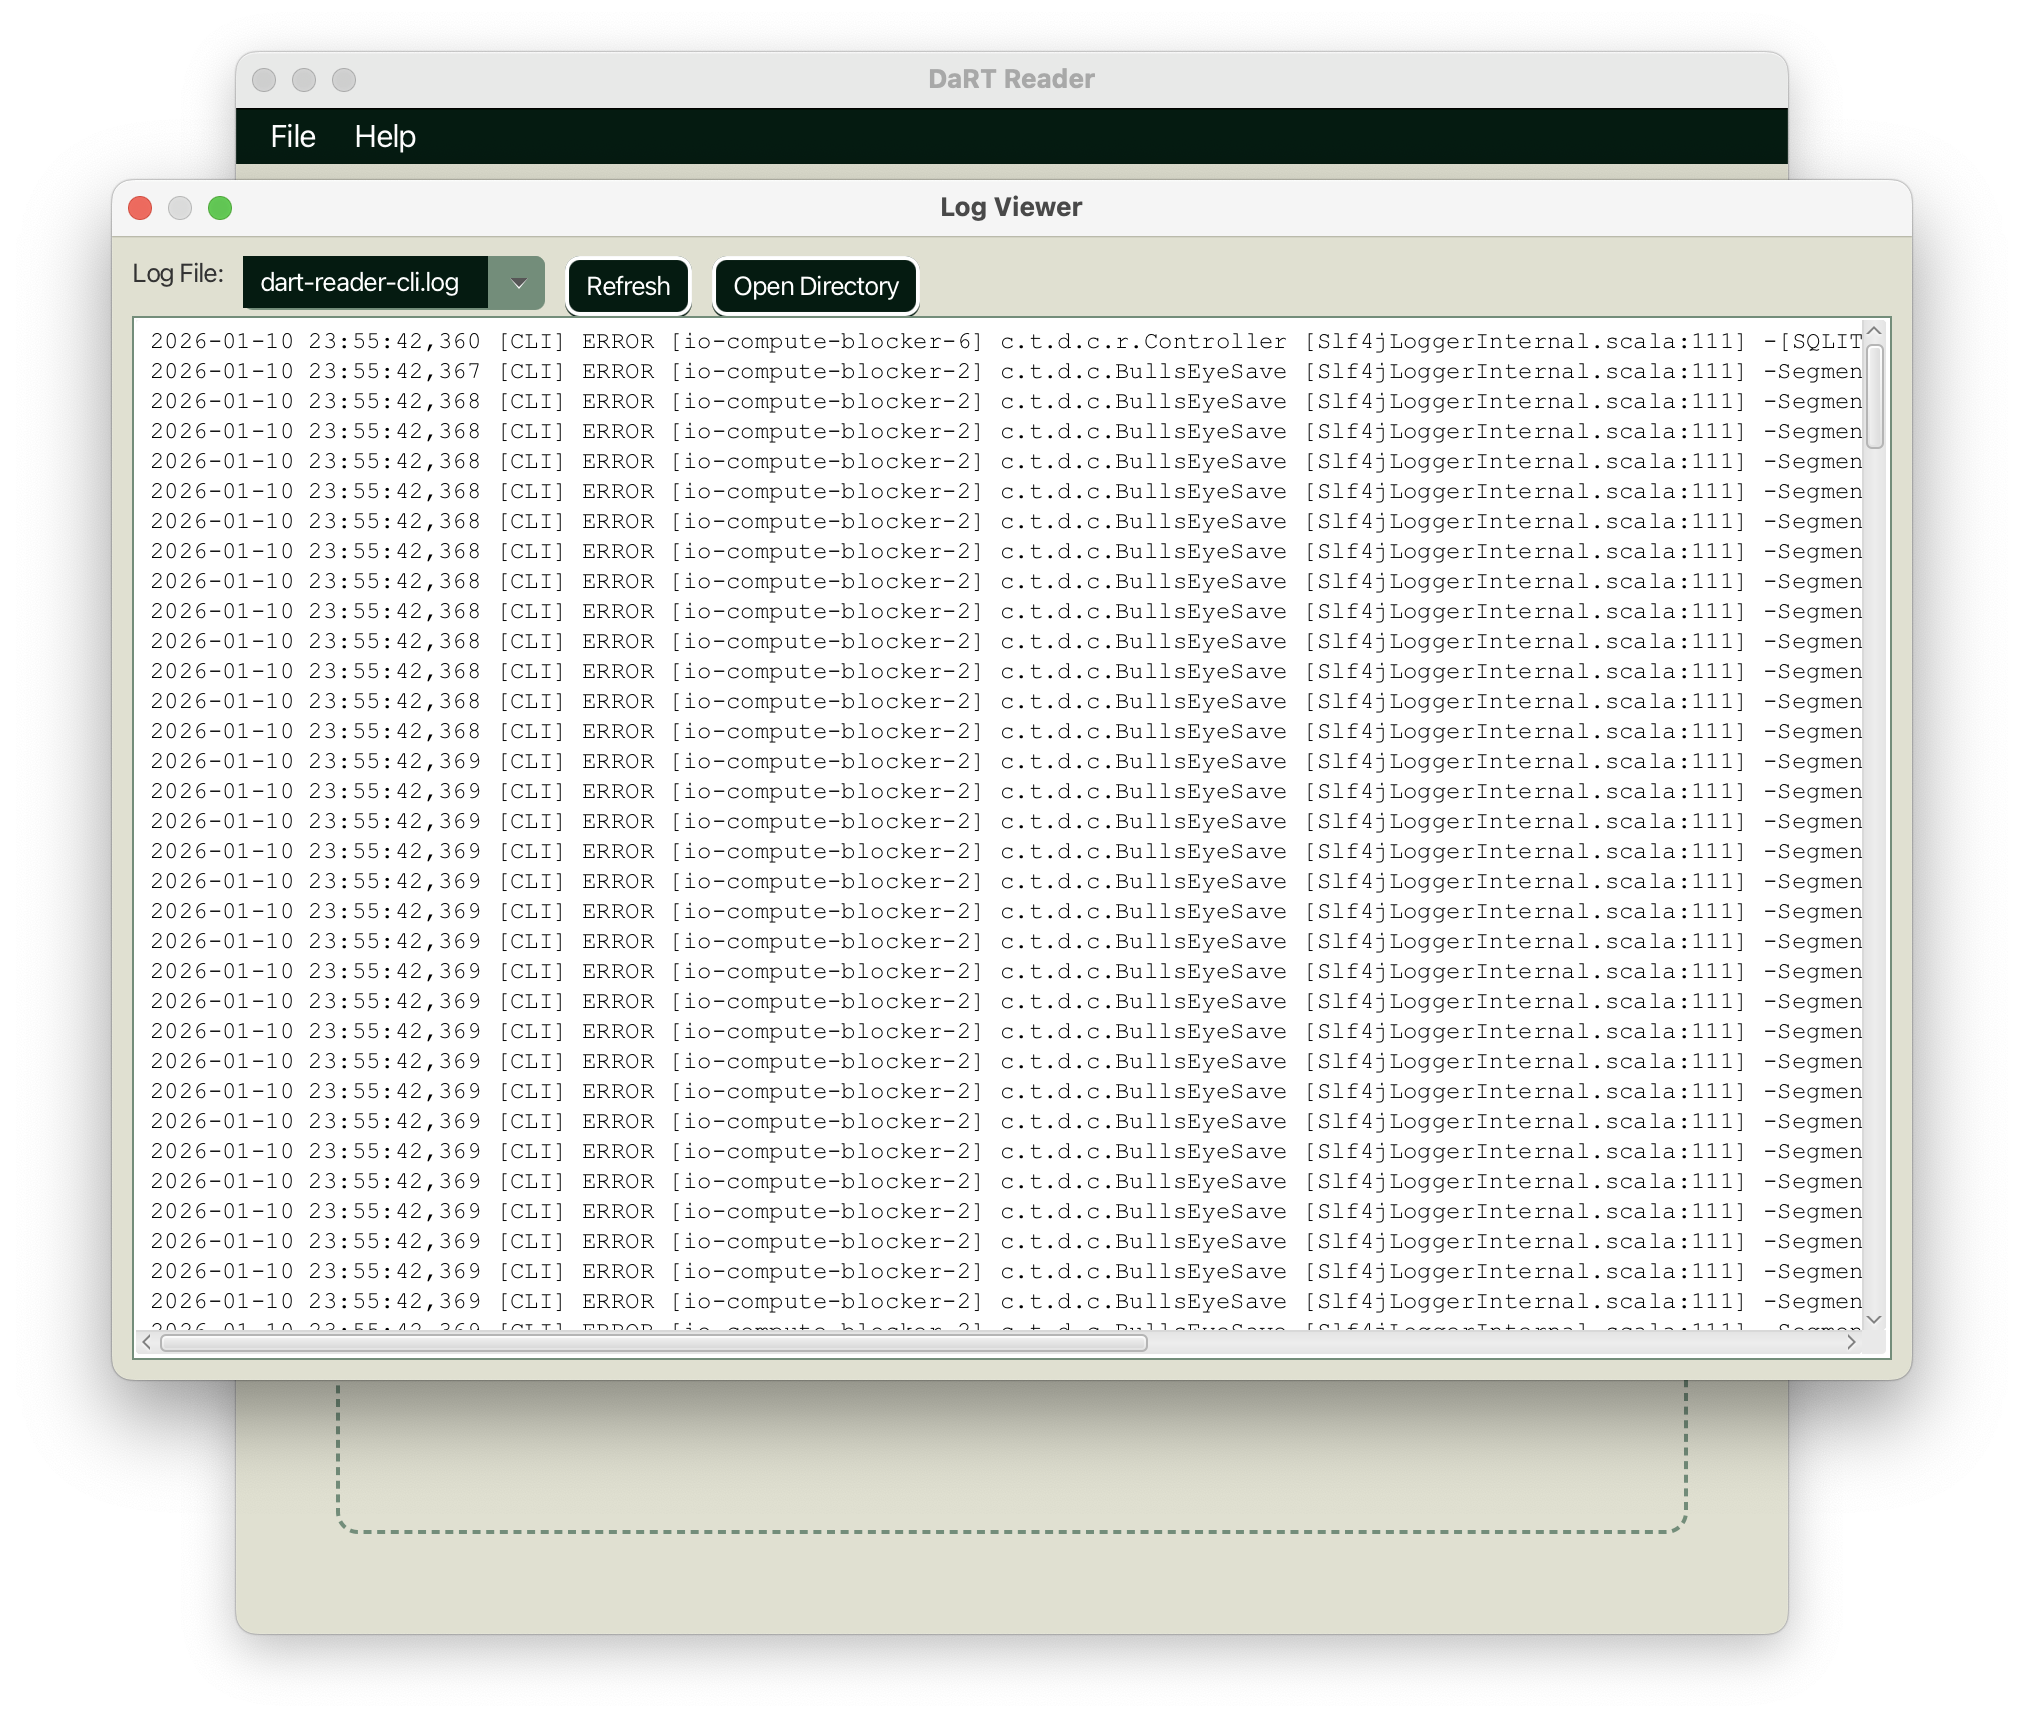
You can select either the logs of the GUI or of the CLI by selecting an appropriate log file in the dropdown. DaRT Reader uses log rotation. When a file is larger than 5mb a new file is created, up to three files after which the oldest file is deleted.
Click Refresh to trigger a new reading of the log files and Open Directory to
reveal the log files in the file system.